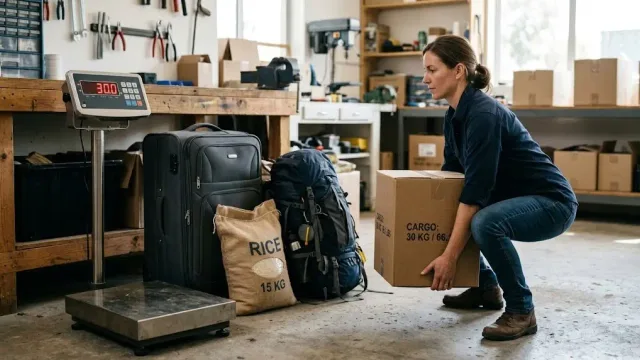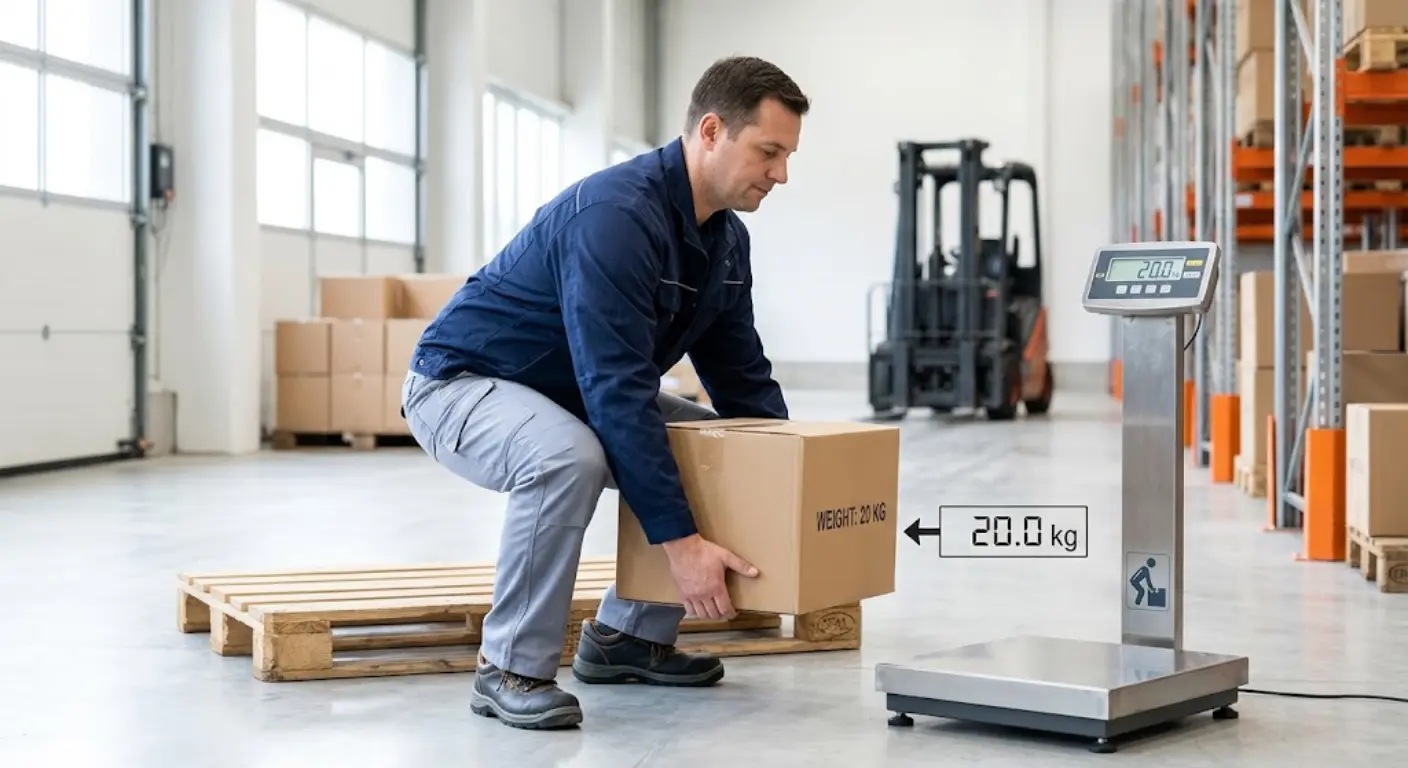
If you’ve ever picked up a heavy box at work and wondered whether you were about to hurt your back, you’ve already asked the exact question the NIOSH lifting equation was built to answer.
Back injuries aren’t rare workplace accidents, they’re one of the most common ways people get hurt on the job, and a large share of them happen during lifting tasks. According to the Bureau of Labor Statistics, employers reported roughly 2.5 million nonfatal workplace injuries and illnesses in a recent year, and overexertion during lifting remains one of the leading causes across industries. The frustrating part is that most of these injuries are preventable. The problem usually isn’t bad luck, it’s a lift that was never designed to be safe in the first place.
That’s where the NIOSH lifting equation comes in. It’s not a vague rule of thumb like “lift with your legs, not your back.” It’s a formula that takes the actual details of a lifting task, how far you reach, how high you lift, how often you do it, and turns them into a number that tells you whether the task is safe, risky, or dangerous.
In this guide, you’ll learn what the NIOSH lifting equation is, how each part of it works, and how to calculate it yourself using a real, traceable worked example. By the end, you’ll be able to look at a lifting task, yours or someone else’s, and know how to judge whether it needs to change.
This article is educational and doesn’t replace a formal ergonomic assessment. If you’re dealing with an existing injury or a high-risk role, talk to a qualified occupational health professional or certified ergonomist about your specific situation.
Quick Answer: What the NIOSH Lifting Equation Tells You
The NIOSH lifting equation calculates a Recommended Weight Limit (RWL), the heaviest weight a healthy worker could lift under specific conditions without an increased risk of low back injury. You then compare the actual weight being lifted to that limit to get a Lifting Index (LI). An LI of 1 or below is generally considered acceptable for most healthy workers; anything meaningfully above that signals rising risk and a task that likely needs to be redesigned.
What Is the NIOSH Lifting Equation?
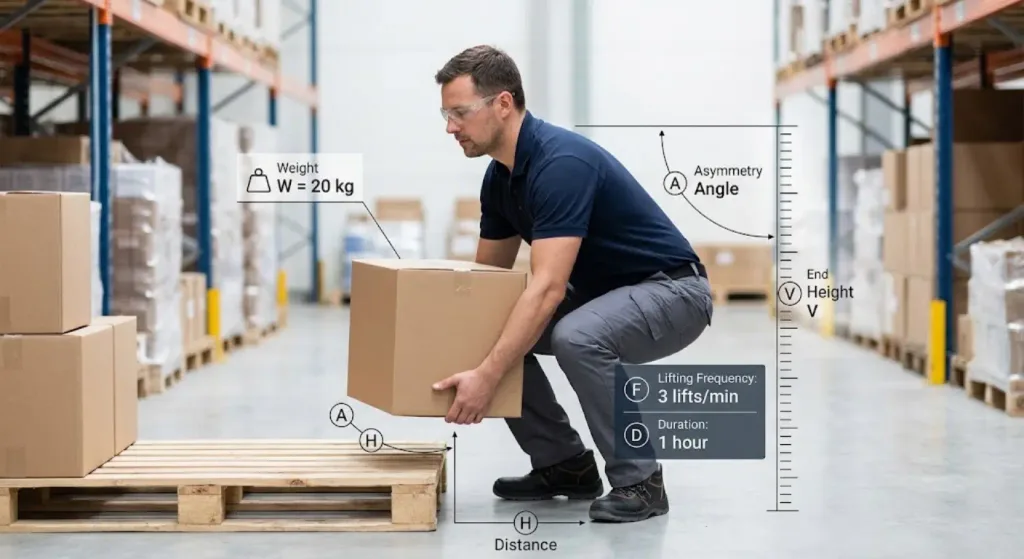
The NIOSH lifting equation is a tool developed by the National Institute for Occupational Safety and Health (NIOSH), part of the CDC, to assess the risk of low back injury from manual lifting tasks. Instead of guessing whether a job is “too heavy,” it gives safety professionals, ergonomists, and employers a repeatable, science-based way to measure it.
Who Created It, and Why
NIOSH first published lifting guidance in 1981, based on a review of the existing research on back injury and lifting. An expert committee later reviewed that original work, and the updated version, the Revised NIOSH Lifting Equation (RNLE), was published in 1994 and has remained the standard reference since. It’s documented in full in NIOSH’s Applications Manual for the Revised NIOSH Lifting Equation (Publication No. 94-110).
What It’s Used For Today
Ergonomists and safety teams use it in a few practical ways. Some apply it before a problem exists, checking that shelf heights, bin placements, or conveyor setups won’t create unsafe lifts before they’re built. Others use it after the fact, quantifying exactly how demanding a task was once a worker has already reported a back injury. And many use it simply to audit: running the numbers across a facility’s existing jobs to see which ones carry the highest risk and deserve attention first.
NIOSH vs. OSHA: Clearing Up the Confusion
These two names get mixed up constantly, so it’s worth untangling them early.
NIOSH is a research agency. It studies workplace hazards and publishes guidance, including the lifting equation, but it doesn’t have enforcement power.
OSHA (the Occupational Safety and Health Administration) is the regulatory agency that can actually issue citations. Here’s the part that surprises a lot of people: OSHA has no specific numeric standard for how much weight someone is allowed to lift. A federal ergonomics rule was passed in 2000 and then rescinded by Congress the following year, and no replacement numeric standard has taken its place since. Instead, OSHA relies on the General Duty Clause, the requirement that employers keep workplaces free from recognized serious hazards, to cite employers for ergonomic hazards, including unsafe lifting. The NIOSH lifting equation is the tool most commonly used to demonstrate that a lifting task has been properly assessed and addressed.
What Each Organization Actually Regulates
| NIOSH | OSHA | |
|---|---|---|
| Role | Research and guidance | Enforcement and regulation |
| Lifting weight limits | Publishes the assessment method (the equation) | No specific numeric lifting standard |
| Can issue fines | No | Yes, under the General Duty Clause |
| What you’ll actually use it for | Calculating whether a specific lift is safe | Meeting a general obligation to provide a safe workplace |
The Formula, Explained Simply
At its core, the equation multiplies a baseline weight by six adjustment factors. Each factor represents something that makes a lift harder or easier, reaching further away, twisting your body, lifting more often, and each one chips away at how much weight is actually safe to lift.
RWL = LC × HM × VM × DM × AM × FM × CM
Here’s what that means in plain terms:
- LC (Load Constant): A fixed starting weight, 51 pounds (23 kg), representing the maximum recommended weight under ideal conditions
- HM, VM, DM, AM, FM, CM: Six multipliers, each between 0 and 1, that reduce the load constant based on how the lift is actually performed
If a lift is done under perfect conditions, close to the body, at knuckle height, no twisting, done rarely, with good handholds, the multipliers stay close to 1, and the RWL stays close to the full 51 pounds. The moment any of those conditions get worse, the RWL drops.
The Six Multipliers, One at a Time
Each multiplier follows its own formula or lookup table from NIOSH’s Applications Manual, based on a specific measurement taken during the lift. Here’s each one explained, with the real values so you can see exactly how a measurement turns into a multiplier.
Horizontal Multiplier (HM) looks at how far the load sits from your body at the start of the lift. It’s calculated as HM = 10 ÷ H, where H is the horizontal distance in inches. Reach further, and this multiplier, and your safe weight limit, drops fast.
| H (horizontal distance, in) | HM |
|---|---|
| 10 | 1.00 |
| 12 | 0.83 |
| 15 | 0.67 |
| 18 | 0.56 |
| 20 | 0.50 |
| 25 | 0.40 |
Vertical Multiplier (VM) cares about height. Lifting from around waist level (about 30 inches off the floor) is the sweet spot; lifting from the floor or from above shoulder height is harder on the body. The formula is VM = 1 − (0.0075 × |V − 30|), where V is the height in inches at the start of the lift.
| V (height off floor, in) | VM |
|---|---|
| 0 | 0.78 |
| 10 | 0.85 |
| 20 | 0.93 |
| 30 (ideal) | 1.00 |
| 50 | 0.85 |
| 70 | 0.70 |
Then there’s distance traveled. Distance Multiplier (DM) accounts for how far the load moves vertically between pickup and drop-off: DM = 0.82 + (1.8 ÷ D). A short lift barely dents your RWL; a long carry chips away at it more.
| D (vertical travel, in) | DM |
|---|---|
| ≤ 10 | 1.00 |
| 20 | 0.91 |
| 30 | 0.88 |
| 50 | 0.86 |
| 70 | 0.85 |
Twisting matters too. The Asymmetric Multiplier (AM) penalizes any rotation of the body during the lift, using AM = 1 − (0.0032 × A), where A is the angle of twist in degrees, even without moving your feet.
| A (twist angle, degrees) | AM |
|---|---|
| 0 | 1.00 |
| 15 | 0.95 |
| 30 | 0.90 |
| 60 | 0.81 |
| 90 | 0.71 |
| 135 | 0.57 |
How often you lift changes everything. The Frequency Multiplier (FM) isn’t a simple formula, it’s a lookup table based on lifts per minute and how long the task continues (up to one hour, one to two hours, or two to eight hours). A lift done once an hour barely registers; the same lift done multiple times a minute for a full shift is a very different task.
| Lifts per minute | FM (duration ≤ 1 hour) |
|---|---|
| 0.2 | 1.00 |
| 0.5 | 0.97 |
| 1 | 0.94 |
| 2 | 0.91 |
| 4 | 0.84 |
| 6 | 0.75 |
(FM also varies by task duration the 1–2 hour and 2–8 hour columns aren’t shown here; see the Applications Manual for the full table.)
And finally, grip. The Coupling Multiplier (CM) is also table-based, scored as Good, Fair, or Poor depending on whether the load has real handles, is merely graspable, or is awkward and bulky with nothing to hold onto.
| Coupling quality | CM (V < 30 in) | CM (V ≥ 30 in) |
|---|---|---|
| Good | 1.00 | 1.00 |
| Fair | 0.95 | 1.00 |
| Poor | 0.90 | 0.90 |
(These tables are abridged from the full lookup tables in NIOSH’s Applications Manual for readability, the free field worksheet linked above includes a slightly fuller version, and the full official tables are in the Applications Manual itself.)
Recommended Weight Limit (RWL) and Lifting Index (LI)
What RWL Means
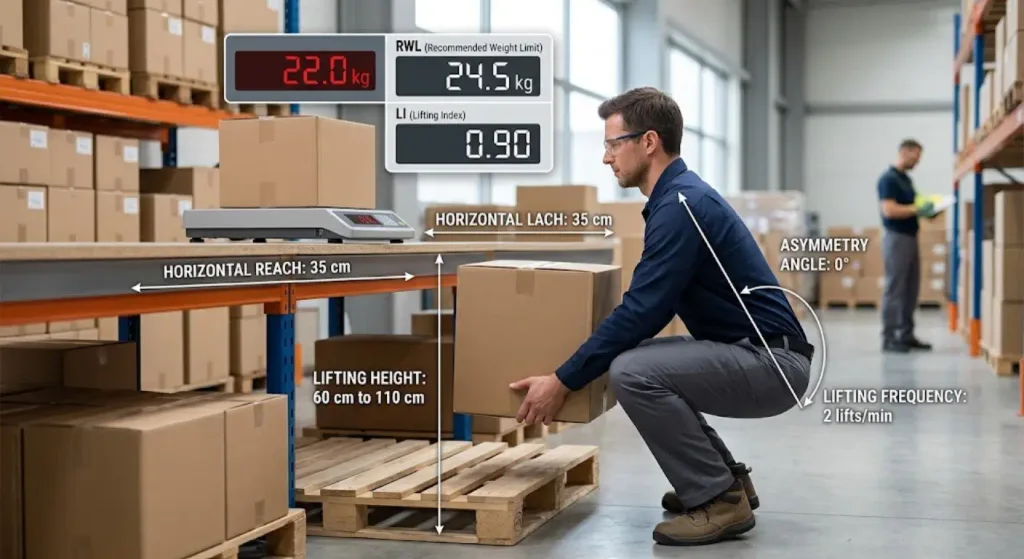
The RWL is the answer the formula produces, the maximum weight considered safe for that specific lift, given all its real conditions. It’s not a universal number. The same worker lifting the same box will get a different RWL depending on how far they reach, how high they lift, and how often they do it.
What LI Means
The Lifting Index compares the actual weight being lifted to the RWL:
LI = Weight Lifted ÷ RWL
This is the number that actually tells you whether a task is a problem.
How They Relate to Each Other
Think of RWL as “what’s safe for this specific task” and LI as “how close the real weight comes to crossing that line.” A low RWL isn’t automatically dangerous, it only becomes a concern once the actual weight being lifted pushes the LI above 1.
Worked Example: Calculating a Real Lift
Let’s walk through an actual calculation, using realistic numbers for a warehouse task, and showing exactly where each multiplier comes from so you can reproduce it yourself.
Step 1: Measuring the Task
A worker lifts a 30kg box from a low shelf to a cart.
- Horizontal distance from body (H): 12 inches
- Vertical height at start (V): 10 inches off the floor
- Vertical travel distance (D): 20 inches
- Asymmetry angle (A): 15 degrees
- Frequency: once per minute, for up to 1 hour
- Coupling: Fair, with the load starting below 30 inches
Step 2: Applying the Multipliers
Using the formulas and tables from the Applications Manual:
| Multiplier | Calculation | Value |
|---|---|---|
| HM | 10 ÷ 12 | 0.83 |
| VM | 1 − (0.0075 × |10 − 30|) | 0.85 |
| DM | 0.82 + (1.8 ÷ 20) | 0.91 |
| AM | 1 − (0.0032 × 15) | 0.95 |
| FM | Table lookup: 1 lift/min, ≤1 hr | 0.94 |
| CM | Table lookup: Fair, V < 30 in | 0.95 |
Step 3: Reading the Result
Multiplying it all out:
RWL = 51 × 0.83 × 0.85 × 0.91 × 0.95 × 0.94 × 0.95 ≈ 27.9 lbs
LI = 30 ÷ 27.9 ≈ 1.08
That LI of about 1.08 tells you this task is slightly above the safe threshold, not an emergency, but a task worth adjusting. Bringing the box closer to the body, or reducing how often it’s lifted, would likely bring the LI back under 1.
A Second Example: What a Comfortably Safe Lift Looks Like
For contrast, here’s the same equation applied to a well-designed task: a 15-pound part lifted close to the body (H = 10 in), from waist height (V = 30 in), moved only a short distance (D = 10 in), with no twisting (A = 0°), infrequently (0.2 lifts/min), with a good handle (Coupling: Good).
Every multiplier comes out at or near 1.00, so:
RWL = 51 × 1.00 × 1.00 × 1.00 × 1.00 × 1.00 × 1.00 = 51 lbs
LI = 15 ÷ 51 ≈ 0.29
An LI of 0.29 is comfortably in the low-risk range, this is what NIOSH’s “ideal conditions” actually look like in practice, and it’s the target to design toward when redesigning a risky task.
Single-Task vs. Multi-Task Lifting
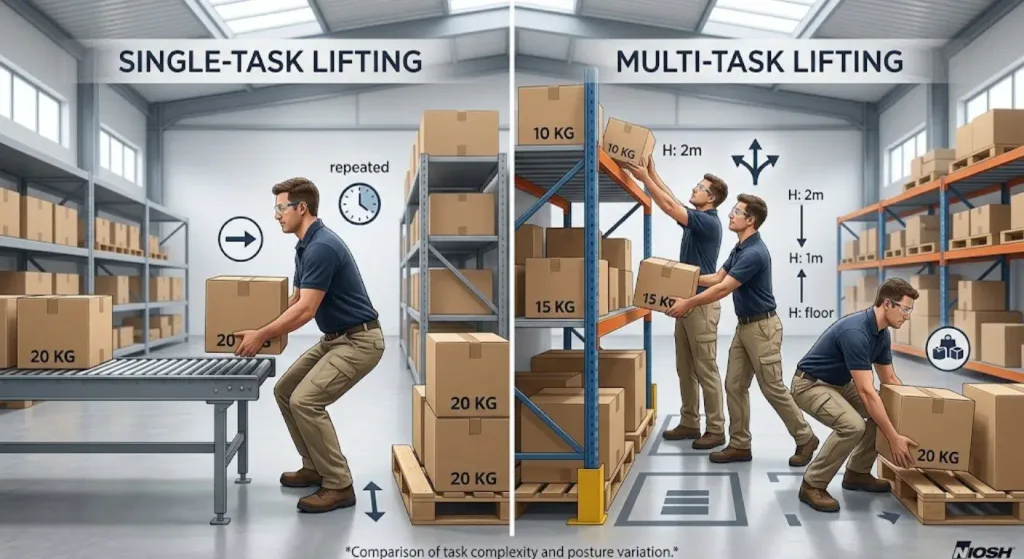
Everything above covers a single, repeated lifting task. But real jobs often involve several different lifts throughout a shift, different boxes, different heights, different frequencies.
When You Need a Composite Lifting Index (CLI)
When a worker performs multiple distinct lifting tasks, NIOSH provides a method for calculating a Composite Lifting Index (CLI), which combines the demand of each task into one overall score for the job. This matters for jobs like order picking or stocking, where no single lift looks dangerous on its own, but the combined physical demand across the shift adds up.
As a simplified illustration: imagine a worker who performs two different lifts during their shift, Task A with an individual LI of 1.1, and Task B, a lighter and less frequent lift, that adds a smaller additional demand on top of Task A once its own frequency and RWL are factored in.
The CLI is calculated by starting with the LI of the most demanding task, then adding each additional task’s incremental contribution to overall fatigue, not simply summing the individual LIs. In practice, this means a job can look acceptable when you check each lift on its own, and still be assessed as high-risk once every lift in the shift is combined. The full CLI calculation requires each task’s frequency-independent RWL, and is detailed step-by-step in NIOSH’s Applications Manual, worth working through directly if your job involves several distinct lifting tasks.
Is Your Lift Safe? Interpreting Your Lifting Index
Once you have your LI, here’s how to read it.
LI Risk-Level Table
| Lifting Index | Risk Level | What It Means |
|---|---|---|
| LI ≤ 1.0 | Low risk | Considered safe for nearly all healthy workers |
| LI 1.0–3.0 | Moderate risk | Some workers may be at increased risk; redesign is recommended |
| LI > 3.0 | High risk | Significant risk of injury; the task should be redesigned before it continues |
LI ≤ 1
The task is within the range NIOSH considers acceptable for the large majority of the workforce.
LI 1–3
The task isn’t automatically unsafe, but it’s outside the ideal range. This is the zone where small changes, moving the load closer, lowering a shelf, adding a handle, often make a meaningful difference.
LI > 3
This is a task that needs intervention. At this level, the physical demand is high enough that redesign shouldn’t wait.
What to Do If a Lift Is Too Risky
A high LI isn’t just a number to note down, it’s a signal to act. The good news is that each multiplier points directly at a fix.
| The Problem | The Fix |
|---|---|
| Load is far from the body (low HM) | Store items closer to the worker’s natural reach zone instead of deep on a shelf |
| Lift starts too low or too high (low VM) | Raise or lower storage so lifts start closer to waist height |
| Long vertical travel (low DM) | Position the destination closer to the pickup point |
| Frequent twisting (low AM) | Reposition the destination directly in front of the worker to remove the need to twist |
| High frequency (low FM) | Rotate the task among workers or slow the pace of repetitive lifts |
| Poor grip (low CM) | Add handles, or repackage the load to make it easier to hold |
| Everything above is already optimized, but the load is still too heavy | Introduce a mechanical aid, a dolly, hoist, or lift-assist device, to remove the lift from the worker entirely |
Limitations of the NIOSH Equation
Powerful as it is, the equation isn’t a universal safety test, it’s important to know where it stops applying.
What It Doesn’t Account For
- It’s built for two-handed, symmetric-style lifting, it doesn’t apply well to one-handed lifts, or to pushing, pulling, or carrying tasks
- It assumes reasonably good footing and doesn’t account for uneven or unstable surfaces
- It doesn’t factor in individual differences like existing injuries, age, or fitness level
- It’s designed around lifting in a standing position, it isn’t meant for seated lifting tasks
For lifts that fall outside these conditions, other ergonomic assessment tools, such as REBA or RULA, are often better suited.
Free Tools to Calculate It Yourself
Doing this math by hand for every task in a facility gets old fast, which is exactly why several free calculators exist. You can work through the equation manually using the tables in NIOSH’s Applications Manual, or use a calculator to save time and reduce math errors. NIOSH itself publishes a mobile calculator app (NLE Calc) for both single and multiple lifting tasks, available on the App Store. Web-based options include the Ergo-Plus NIOSH Lifting Equation Calculator and the calculator referenced in CCOHS’s NIOSH Lifting Equation fact sheet.
Common Mistakes When Measuring
Mistakes That Skew Your Result
- Measuring from the wrong reference point: horizontal distance should be measured from the middle of the body to the middle of the hands, not the edge of the box
- Ignoring the destination measurements: many people only measure where the lift starts and forget the equally important measurements at where it ends
- Underestimating frequency: rounding “a few times a minute” down instead of counting an actual rate
- Guessing coupling quality: actually testing the grip, rather than assuming a box is easy to hold
- Assuming one measurement covers a whole shift: task conditions can change throughout the day and should be reassessed if they do
FAQs
What is the NIOSH lifting equation used for?
It’s used to assess whether a manual lifting task puts a worker at increased risk of low back injury, and to guide redesigning tasks that carry too much risk.
What is considered a safe Lifting Index?
An LI of 1.0 or lower is generally considered safe for nearly all healthy workers. Higher values indicate increasing risk.
What happens if my Lifting Index is above 1?
It doesn’t mean an injury is guaranteed, but it does mean the task exceeds the recommended limit for a large share of the workforce and should be reviewed for redesign.
Is the NIOSH lifting equation required by OSHA?
No. OSHA doesn’t mandate its use directly, since it has no specific numeric lifting standard. However, it’s the most widely accepted method for demonstrating that a lifting task has been properly assessed under OSHA’s General Duty Clause obligation to provide a safe workplace.
What’s the difference between RWL and Lifting Index?
RWL is the maximum safe weight for a specific task. LI compares the actual weight being lifted to that limit, giving you a single number to judge risk by.
How often should lifting assessments be redone?
Whenever a task changes, a new storage layout, a different container, a change in frequency, since any of those changes the underlying measurements and can shift the result.
Conclusion
The NIOSH Lifting Equation helps evaluate lifting tasks by considering factors such as weight, reach, height, frequency, and grip. It provides the RWL and Lifting Index, helping identify tasks that may need improvement. Using these results, workplaces can make simple changes to reduce lifting risk and improve safety.